Maven Web Application
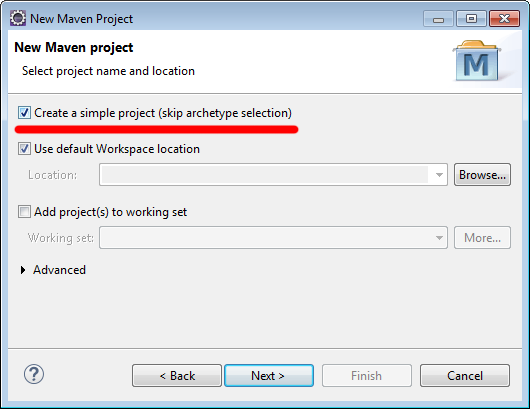
Create a Maven project in Eclipse. During project creation, choose the Create a simple project option as shown in the screenshot below:
And on the next screen, fill out Group Id, Artifact Id, and change Packaging to war. You can leave all other fields as is.
1. After the project is created, add the following to pom.xml (inside <project> and after <packaging>):
  <properties>

    <maven.compiler.source>1.8</maven.compiler.source>

    <maven.compiler.target>1.8</maven.compiler.target>

  </properties>

  <dependencies>

      <dependency>

          <groupId>javax.servlet</groupId>

          <artifactId>javax.servlet-api</artifactId>

          <version>3.1.0</version>

          <scope>provided</scope>

      </dependency>

      <dependency>

          <groupId>javax.servlet</groupId>

          <artifactId>jstl</artifactId>

          <version>1.2</version>

      </dependency>

  </dependencies>
These changes specify that the project requires JDK 1.8 and add the following dependencies:
- javax.servlet:javax.servlet-api:3.0.1
- javax.servlet:jstl:1.2
2. Create a folder WEB-INF under /src/main/webapp, then create a file web.xml under WEB-INF with the following content:
<?xml version="1.0" encoding="UTF-8"?>

<web-app xmlns="http://xmlns.jcp.org/xml/ns/javaee"

    xmlns:xsi="http://www.w3.org/2001/XMLSchema-instance"

    xsi:schemaLocation="http://xmlns.jcp.org/xml/ns/javaee http://xmlns.jcp.org/xml/ns/javaee/web-app_3_1.xsd"

    version="3.1" id="springmvc">
    <display-name>SpringMVC</display-name>


    <welcome-file-list>

        <welcome-file>index.html</welcome-file>

    </welcome-file-list>


</web-app>
3. Right click on the project and select Maven -> Update Project...
Now you have set up a Maven web project to which you can add your code.
|